
Microphone is the best way to communicate with someone through your computer or laptop. But sometimes, the microphone settings can be tricky, and you may need to learn how to set it as a default device on your Windows 10 operating system.
Fortunately, setting up your default microphone on Windows 10 is a simple process that can be done in just a few steps.
In this guide, we’ll help you, How to Set Default Microphone Windows 10 and ensure your microphone is ready for all your communication needs.
Quick Access
ToggleWhat is the Default Microphone in Windows 10?
The default microphone on Windows 10 is your computer’s primary audio input device for all its communications. This includes making and receiving calls, using voice commands, recording audio, and other tasks requiring a microphone.
When you plug in a new microphone to your computer or laptop, Windows 10 automatically detects and sets it as the default device. However, you may need to manually set your microphone as the default if it’s not working correctly or you have multiple microphones connected.
How to Set Default Microphone Windows 10 (Video Tutorial)
How to Set Default Microphone Windows 10
Here are the steps to set your microphone as the default on Windows 10; you’ll need to follow every step with precision and accuracy to complete the job correctly.
Firstly, you must Right-click on the Speaker icon in the bottom right corner of your taskbar. Then click on the Open Sound Setting option.
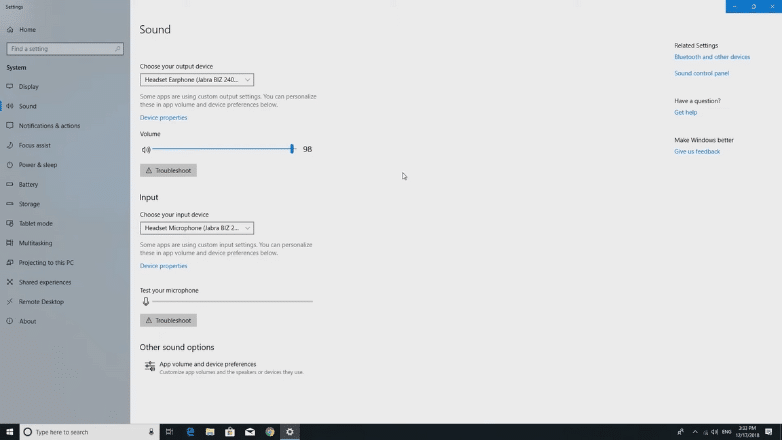
You’ll come to this page after clicking on the Open Sound Setting.
After coming to this page, you can choose your Output Device on the top page.

If you want to change your output device, you can choose your output device by clicking on this selected area.

You must come to this area to Set up your Default Microphone in Windows 10. After coming to this area, click on the Choose input device box.
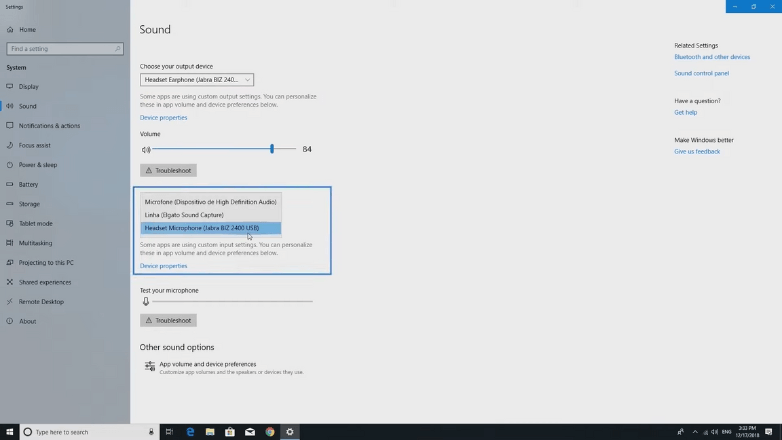
Then, your microphone, which you want to set as the default device, will be listed. You can select your microphone from the list.
Now, your chosen microphone is set as the default device on Windows 10.
You can use the Test Your Microphone option to record and play back a short audio clip to test if everything works correctly.
Select the correct one as your default device if multiple microphones are connected. You can adjust your microphone’s volume and other settings from this page.
Additional Tips
- Ensure your microphone is connected correctly and turned on before setting it as the default device.
- If your microphone is not working after setting it as the default, try restarting your computer or updating your audio drivers.
- Select the correct input device from the drop-down menu if you’re using a USB microphone.
- Some applications may have microphone settings that override the Windows 10 default. Make sure to check and adjust these settings if necessary.
Conclusion
Setting your default microphone on Windows 10 is a simple process that can significantly enhance your communication experience on your computer or laptop.
Following these steps, you can easily set up and use your preferred microphone for all your audio needs.
So, follow this guide and enjoy seamless communication with others through your Windows 10 device!
Remember, if you ever need to change your default microphone again, you can always return to this guide for reference.


